Clutch replacement, Volkswagen Vento/Golf 3 gearbox repair
A photo report showing the way to replace Volkswagen Vento / Golf III cars clutch and repair its gearbox.
Oil addition and its presence in the engine compartment in the wrong places (it attracts dirt like a magnet and everything acquires a terrible, sticky filth) occurred in the current particular case. Oil poured through differential oil seals, therefore the car left a puddle after each parking. It made no sense to just replace the glands since the differential had a backlash (moved to the left — to the right, from one wheel to another) for about 10 mm. Therefore, it was decided to replace both the current differential bearing as well as clutch kit.
The following things are required in order to successfully complete the procedure:
- inspection pit (overpass);
- a pair of jacks and stand;
- garage set (keys + hammer);
- differential bearing;
- clutch (Luk 621 1333 19).
Start to repair the gearbox type 020, 5-t., CHE while having these tools and parts.
Note that the 020 type transmission removal and installation for the Golf 3 is similar to the 085 type transmission removal and installation. Therefore, it’s possible to find the similar 085 gearboxes removal procedure data if 020 type one is not enough.

The car is driven into the garage with a pit and put on the props.
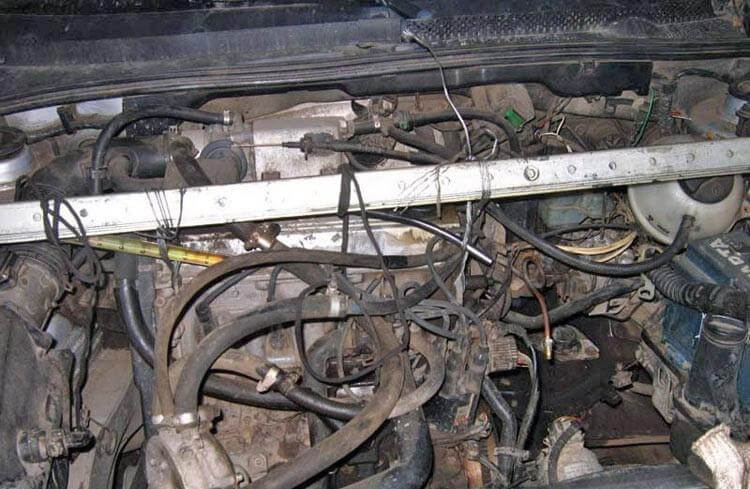
The engine must be suspended since two props of the three will be unscrewed while removing the gearbox. A bunch of corners was found for these purposes. Tests have confirmed they are strong enough and can’t be bend. Corners are laid on the wings through wooden sticks. The engine is winded up with a cable (3 mm).
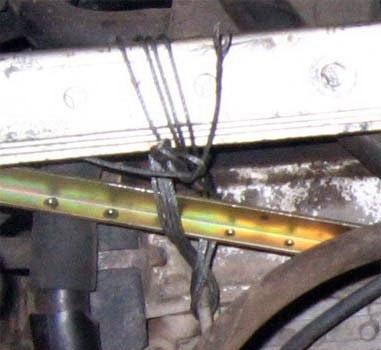
Wind up the engine here.
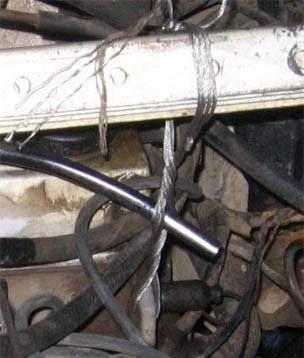
And here.

Now unscrew:
- Front prop bolts, they support the starter. One prop bolt — pillow, three prop bolts — starter — gearbox — engine. 16 size head is required.
- Back prop bolts. One prop bolt pillow (didn’t manage to unscrew), therefore I had to replace the pillow. Three prop bolts — gearbox
- Internal CV joints from flanges. 6 screws for CV joint.
- Disconnect transmission choice levers, speed and backing sensors, coupling squeezing cable.
The gearbox remains bolted to the engine with three bolts (two above, one below). It’s possible to tighten and remove the gearbox after unscrewing them. Its weight is 30 kg. Golf 3 transmission removal can be viewed here for better clarity.

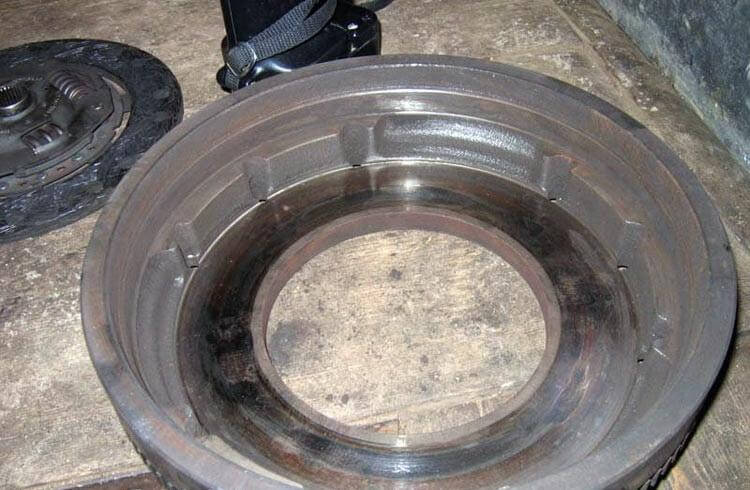
Now flywheel can be seen.
Clutch disc.
Remove the flywheel once 9 screws are unscrewed (9,12 sizes key/head are required).

Remove the clutch disc.
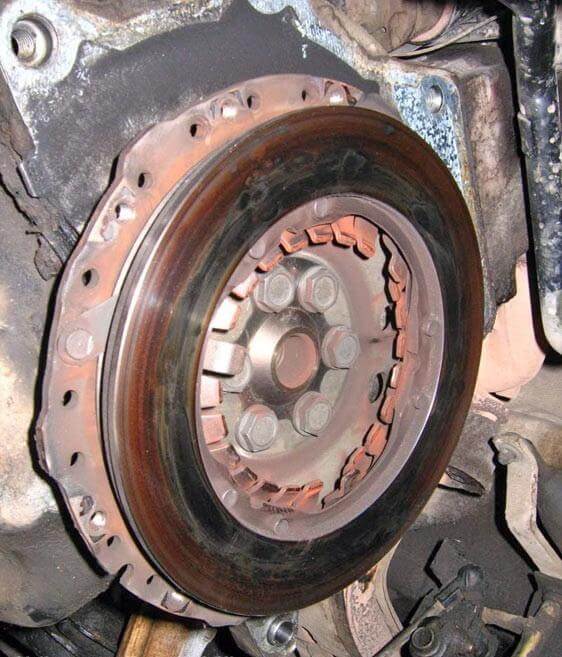
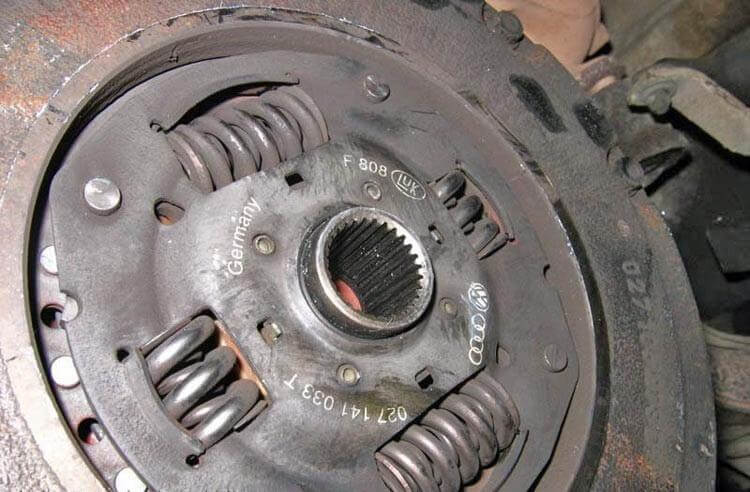
Pressure disc.

Unscrew the pressure disk.
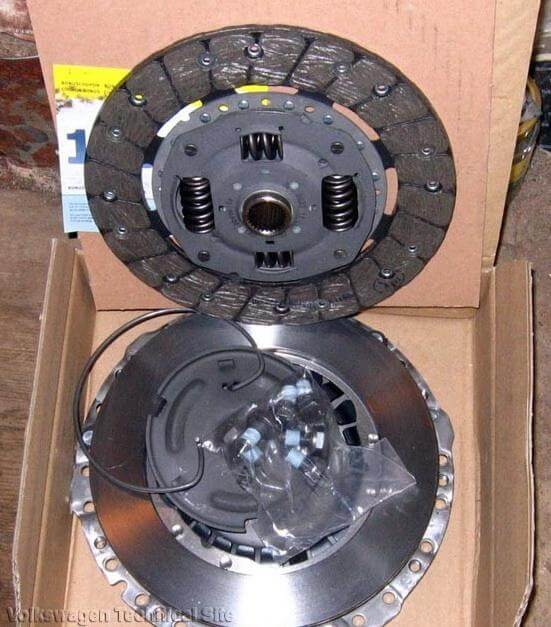
New Luk clutch kit.

Now screw the new pressure plate (bolts included). Put the plate, disk, flywheel. enrich the clutch disc to move and center it while using a caliper. Then screw the flywheel.

Now look at the gearbox.Transmission: 020 type, 5 speed, CHE. Parse the gearbox.
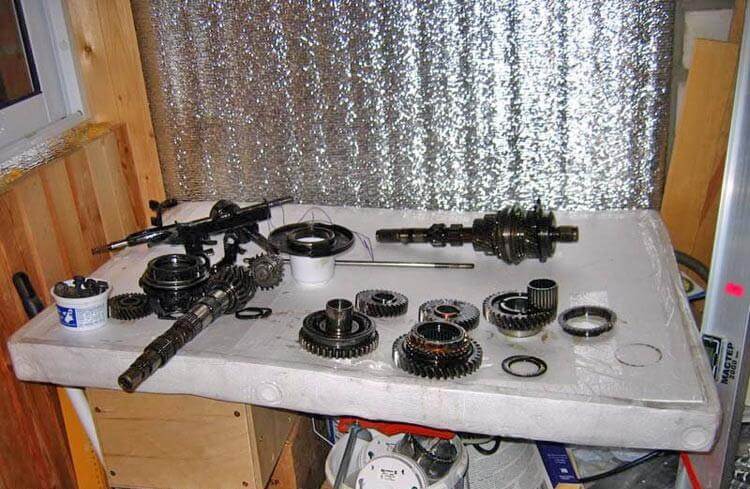
The gearbox inside parts.
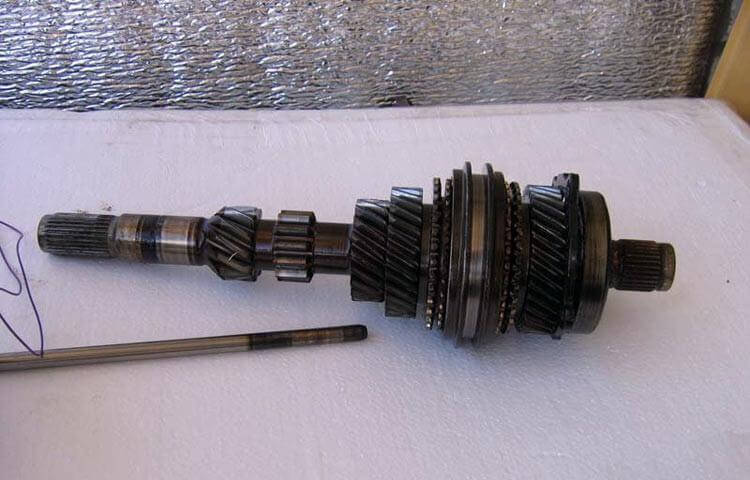
Primary shaft.
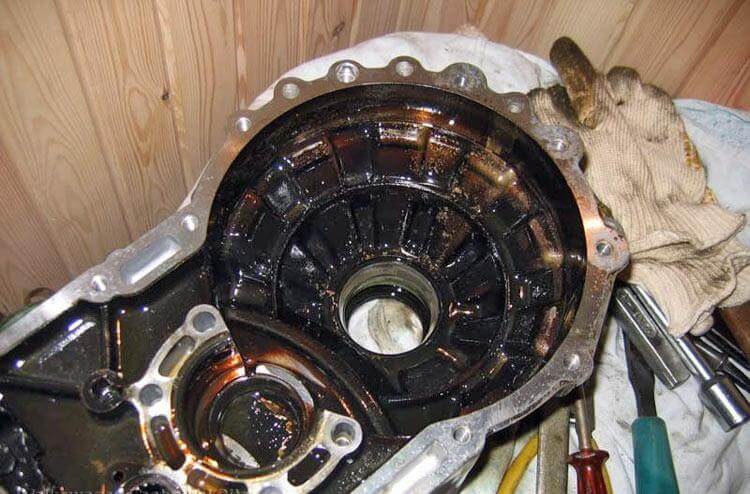
Transmission housing.
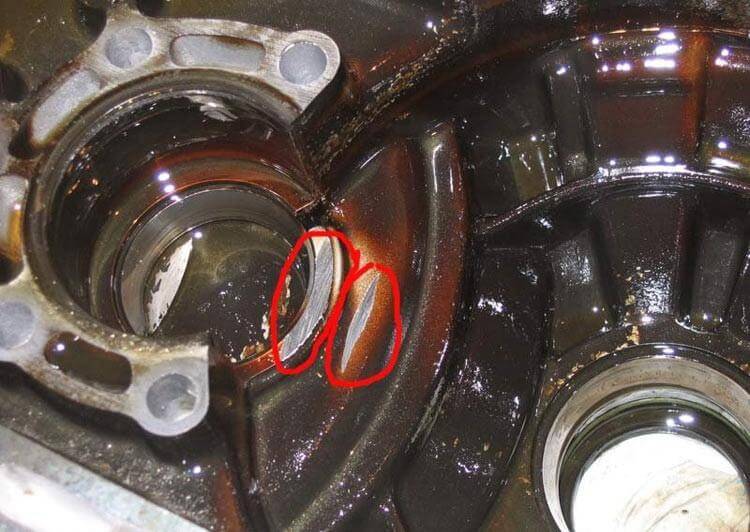
The photo shows that the gearbox case is filmed with a differential went bad.
The differential went bad behavior is caused by the bearing, which is very worn out and subsided compared with the new for some reason.
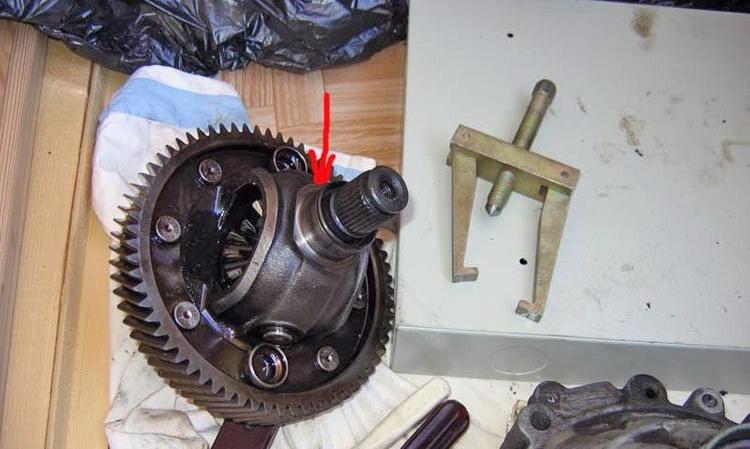
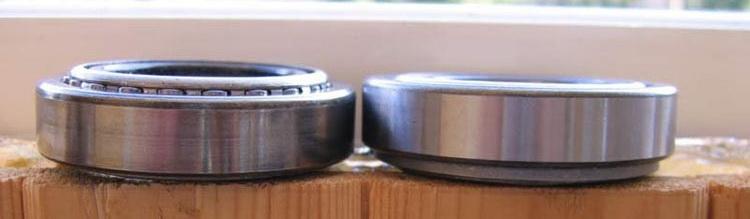
This bearing is from here. A new Japanese KOYO bearing has been bought.The old washers were used to adjust, they were just enough.The gearbox is assembled without gaskets on the sealant.
