Replacement of fuel filter of Suzuki Grand Vitara
It should be mentioned that replacement of fuel filter of Grand Vitara is not an easy thing and availability of pit and ramp is compulsory. I think that all owners of this car know where fuel filter is located in Suzuki Grand Vitara. This is a great disappointment since it is not an easy to remove fuel tank (then silencer and universal-joint shaft) but what can you do. If you don’t want to spend 3 hours in garage, address to service center. However, in this case you will pay not only for fuel pump assembly (since original fuel filter is an integral part of fuel pump) but also for labor hours.
Therefore I recommend to ask your friend for help and review this photo instruction on removal of fuel tank and removal/replacement of fuel pump of Suzuki Grand Vitara with 2.0 engines. There are two variants for removal of fuel tank: you can buy expensive original kit or inexpensive non-original fuel filter and install it instead of old one (in the end of this photo report, there is some information on removal of the filter). However, I recommend to purchase new fuel pump assembled with coarse filter (screen) and fine filter since replacement procedure is not frequent.
For instruction of removal of fuel pump and replacing fuel filter in Suzuki Grand Vitara, see photo report.
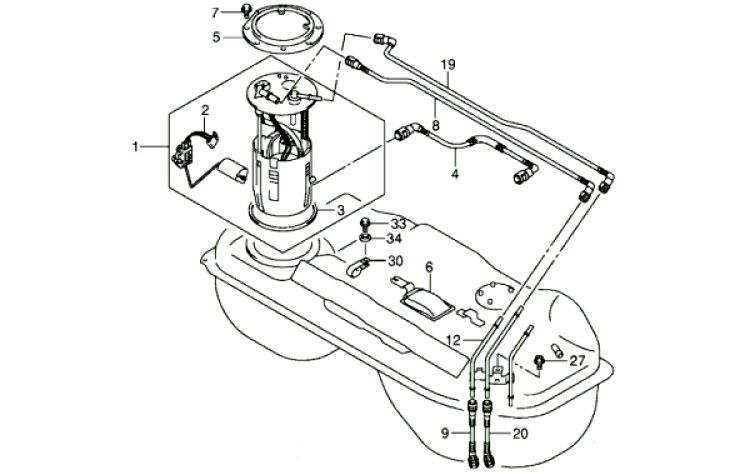
Instruction on repair of Suzuki Grand Vitara specifies that fuel filter assembled with fuel pump for Suzuki Grand Vitara in located in fuel tank. You can access to it only by removal fuel tank.
To remove fuel tank and replace fuel pump assembled with fuel filter, you will the following tools and materials:
- socket wrench, set of heads and 17” spanner wrench;
- thread locking (required for tightening of bolts of rear joint);
- fuel filter (reference No. 15100-65842);
First, remove exhaust silencer and unscrew rear joint.
Remove rear universal-joint shaft using socket wrench with 17” head while holding it with 17” spanner wrench (4 bolts).
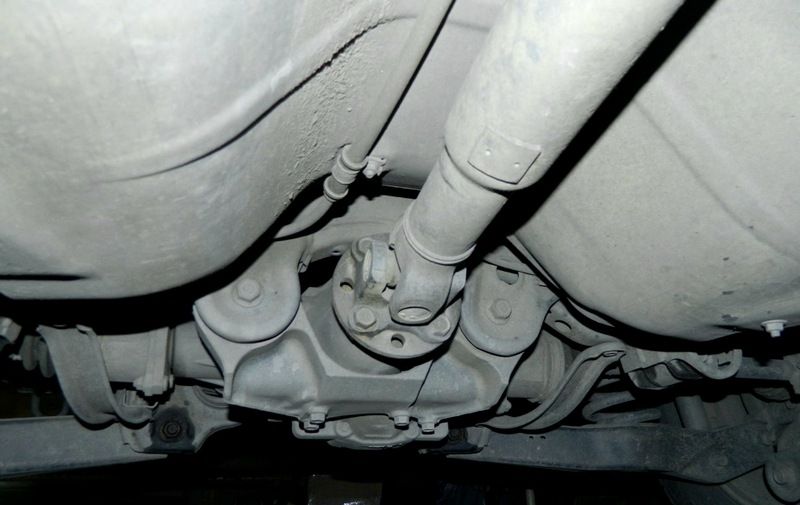
On the side of distribution gearbox, rear universal-joint shaft should be removed from sliding shaft.
Prior to remove universal-joint shaft, place marks in the form of lines in adjacent places (at distribution gearbox and rear differential)! Otherwise you will feel vibrations since universal-joint shaft requires alignment.
Now, universal-joint shaft is removed. Then unscrew clamping nuts of handbrake cables. For this purpose, use 10” socket wrench.
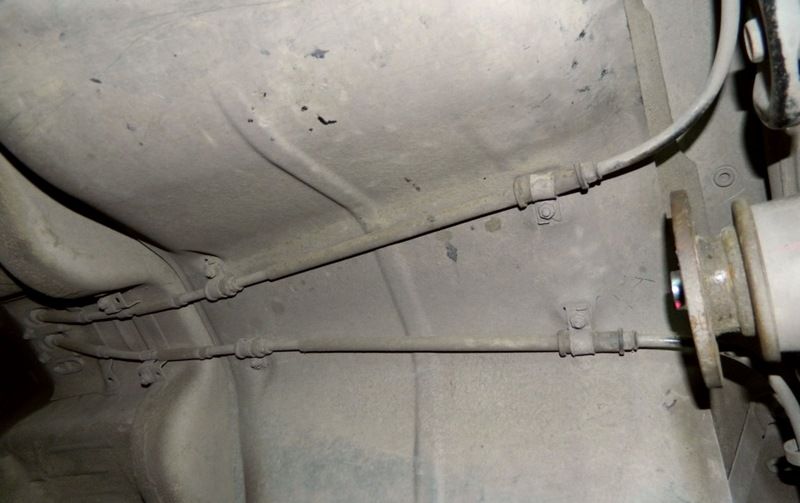
Unscrew six nuts. Then remove two bolts fixing handbrake on the side of rear differential. Then place them on sides so that they do not prevent replacement of fuel tank.
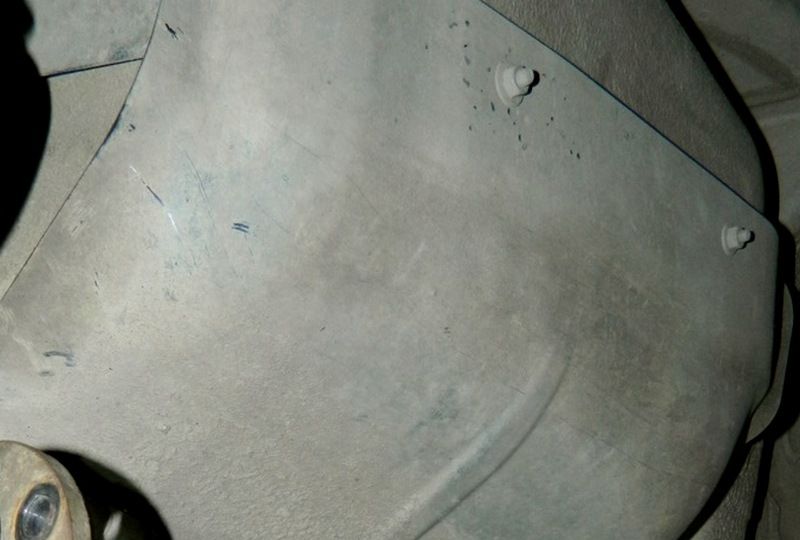
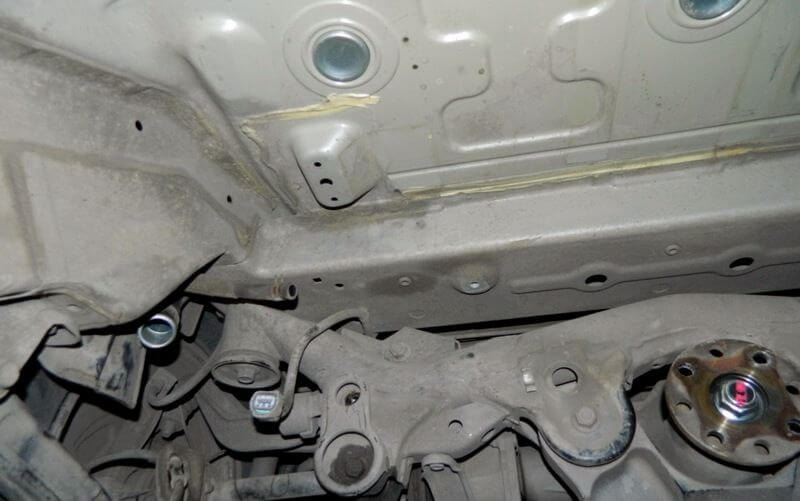
Unscrew and remove fuel tank protection of Suzuki Grand Vitara. The protection should be fixed with four nuts that can be unscrewed with 10” socket wrench.
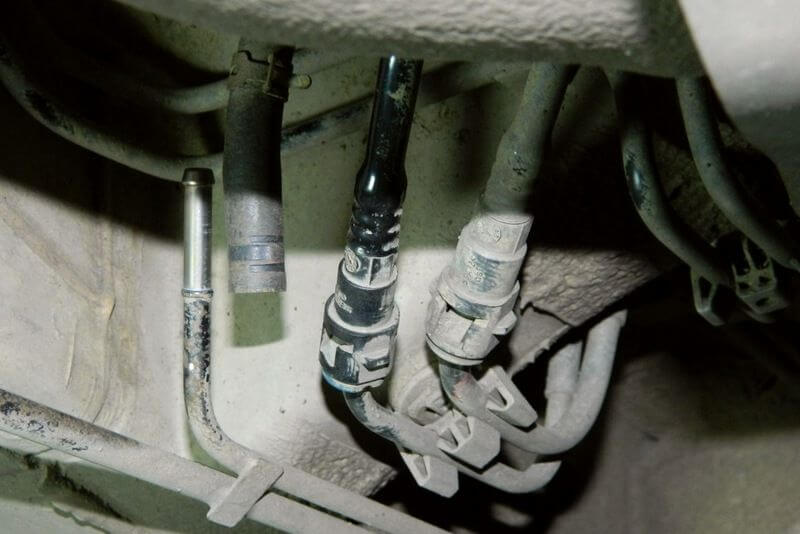
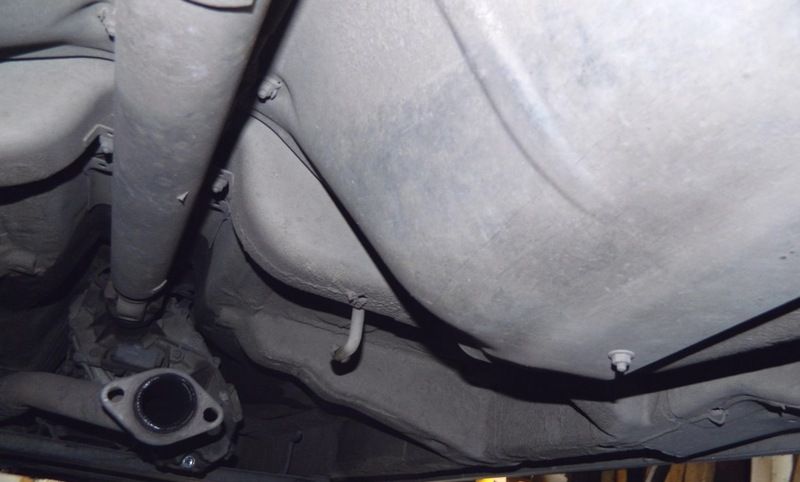
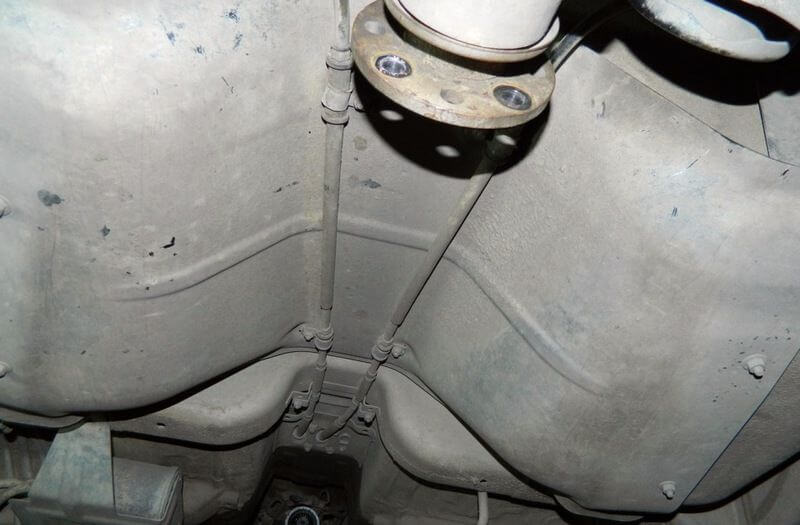
Then remove hoses of vapor fans and two fuel feeding/returning hoses at front left side of fuel tank on distribution gearbox. Hose of vapor fans (to be fixed with clamp) and feeding/returning hose (to be fixed with latch mechanism).
It is easier to catch latches with awl. For this purpose you should need two awls. Place one awl under latch mechanism on the one side (by pulling it) and pull it by the other awl on the other side.
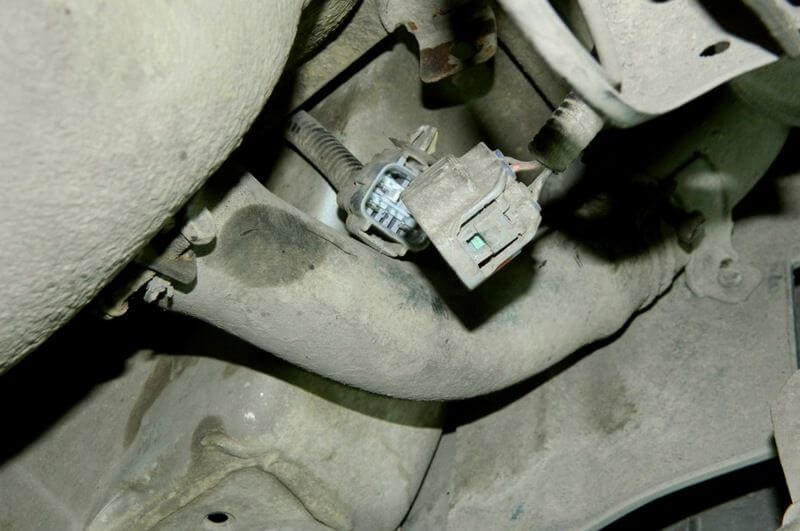
Then remove hose of tank filler and disconnect wire connector on rear right side (on the side of rear bumper).
To remove fuel tank, install adjustable jack on the left side and place the support under right edge of fuel tank (you can use jack or wooden blocks). Then remove fixtures of fuel tank (2 metal bands are curved according to the shape).
Fitting of fuel filler is fixed with clamps. Therefore loosen and remove it from fuel filler (insert plug into fuel tank to prevent its contamination) to remove upper part.
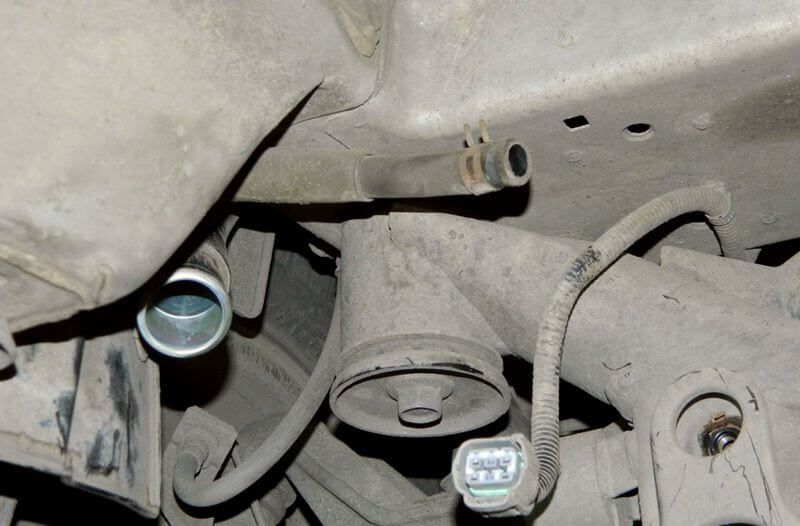
Mover right edge of fuel tank to extremely lower position and hold it to remove air draining fitting (it is located above wire connector and fuel filler fitting). For this purpose, press out the clamp and disconnect fitting.
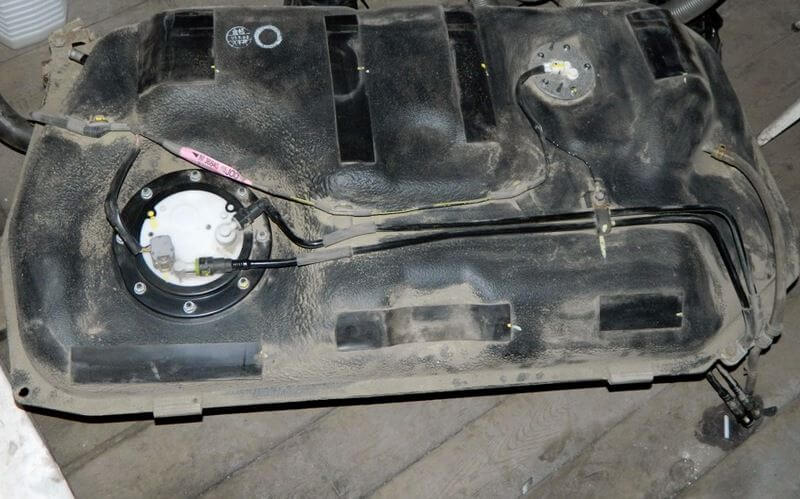
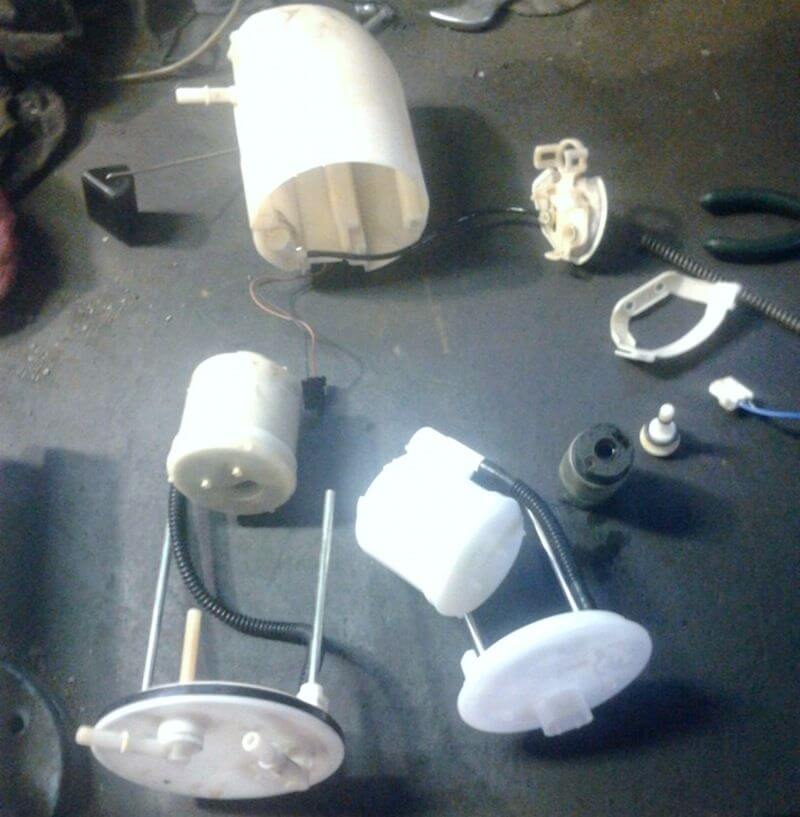
Now, the tank is removed and you need to remove fuel pump assembly and replace it. Prior to do this, clean fuel tank top from dirt!
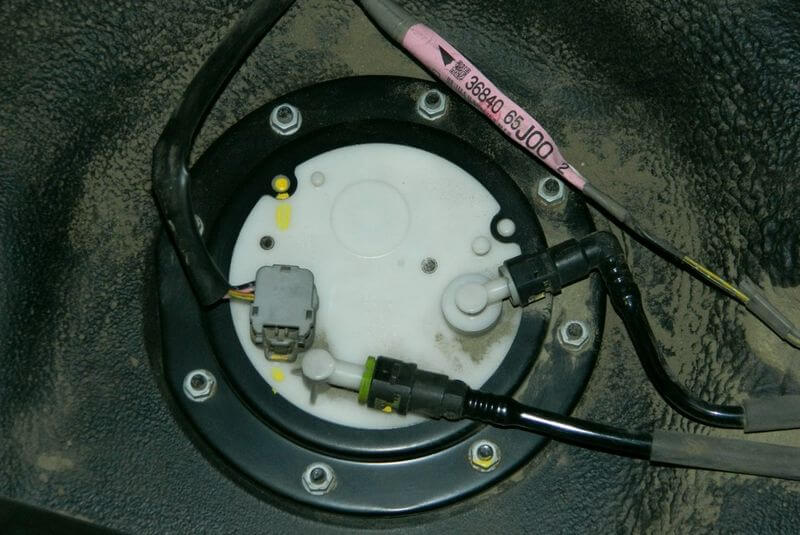
Unscrew eight fixing nuts (use socket wrench with 10” head)...

...and disconnect hoses (they are attached with the same latches as those used for fixing feeding/returning hoses) and connector.
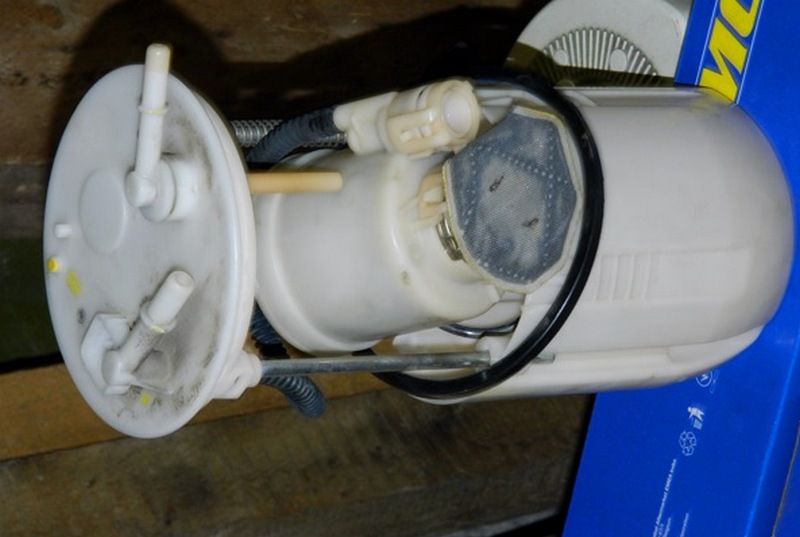
Carefully remove entire fuel station from fuel tank.
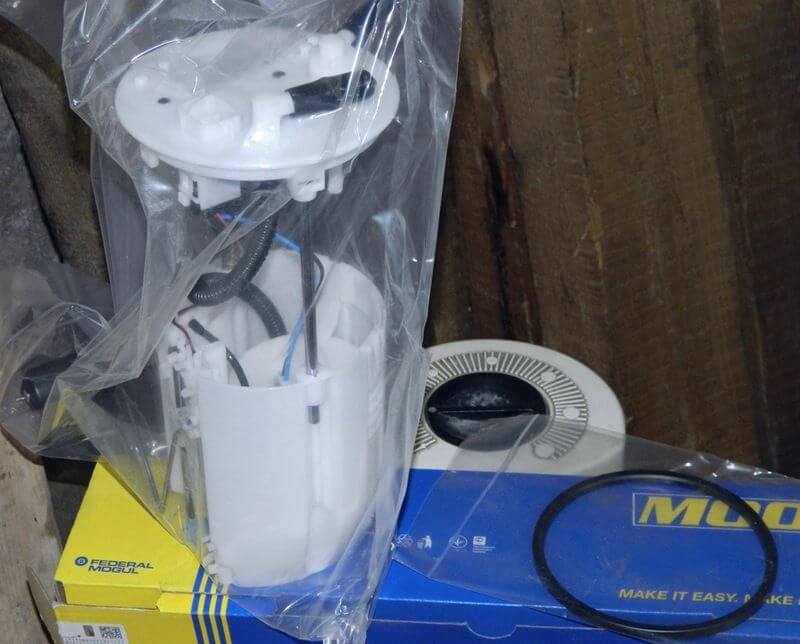
New fuel tank assembled with fuel filter should be installed in reverse order. Do not rush when the fuel tank is removed. It is recommended to inspect it inside and clean from different sediments!
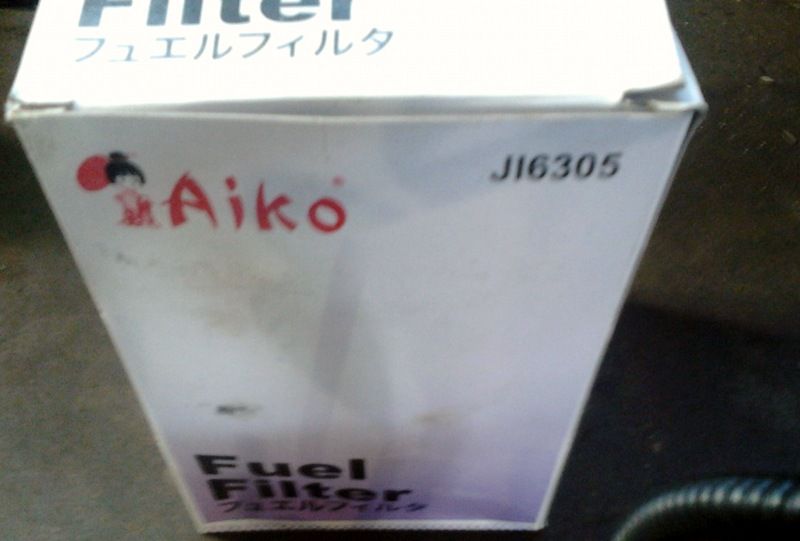
Now, I will explain other variant of replacement of fuel filter in Suzuki Grand Vitara. For this purpose, purchase non-original fuel filter. You can use the same filter or other filter from Toyota Camry.
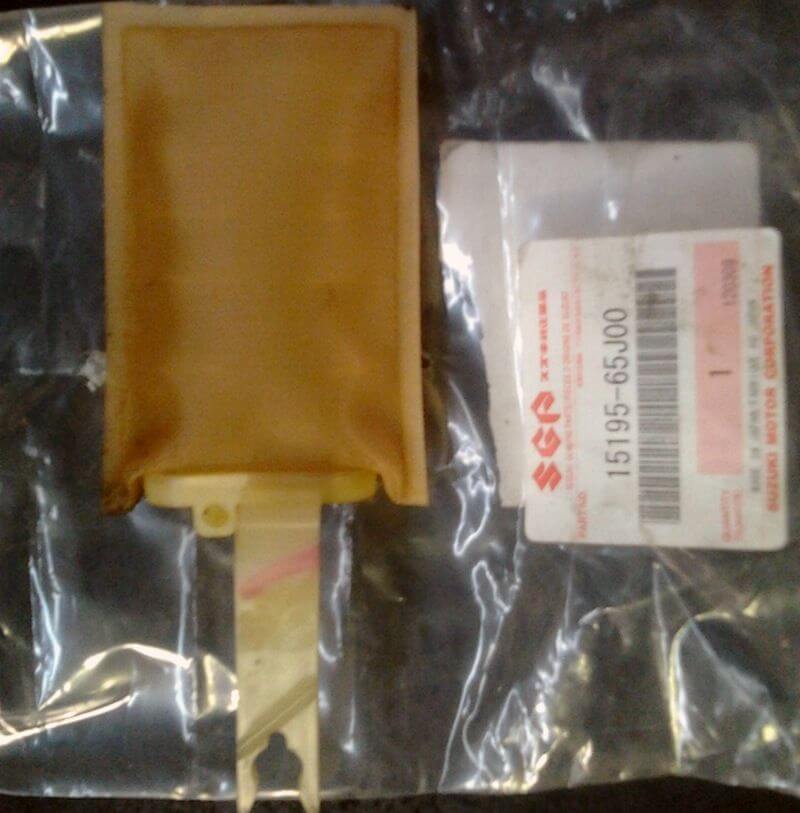
You can also purchase filter screen separately but you should study not only it dimensions and but also fixation.
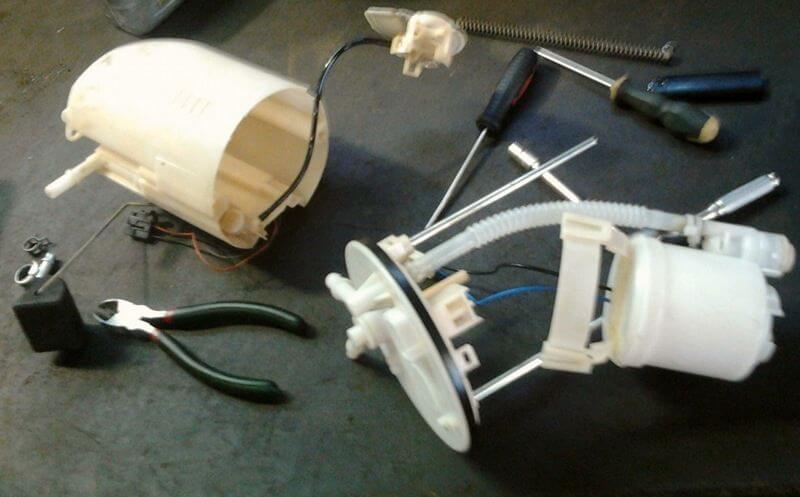
Disassemble our fuel pump assembly to remove the tank with fuel filter and insert new one.
It will cost you some efforts since covers of fuel station will different therefore you need to remove black hose (remove this hose by heating it with lighter and fix the new one with clamp).
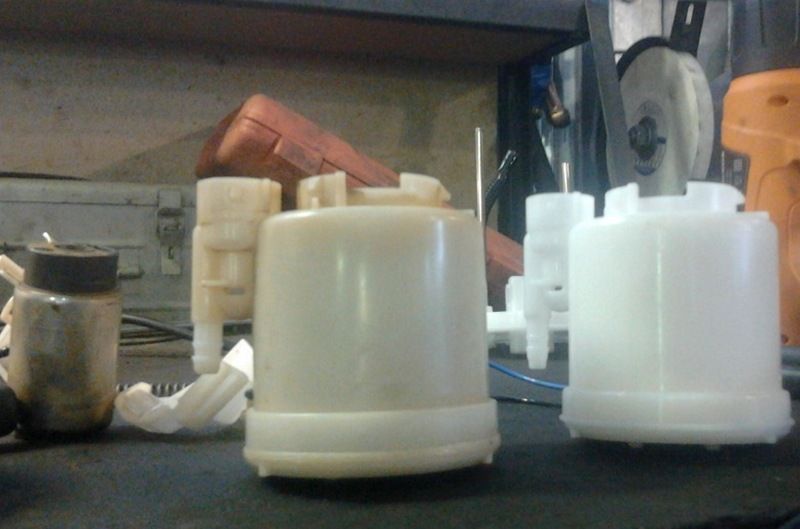
Clean filter screen and assemble all parts.
