Toyota Land Cruiser Prado 120 rear axle bearing replacement
It’s required to have a vice, a small suitable diameter pipe, a gas plug, a powerful hammer and a standard tools set in order to replace Toyota Land Cruiser Prado 120 rear axle hub bearing. In general, Toyota Land Cruiser Prado 120 rear axle wheel bearing replacement procedure is not an easy one, it requires certain labor. Be sure to look through Toyota Land Cruiser Prado 120 rear axle wheel bearing replacement in order to learn the way to perform such procedure.
Besides you have an opportunity to see Toyota Prado 120 and Lexus LX 470 (UZJ) front hub bearing replacement photo manual.
Which rear axle bearing should be put on Toyota Land Cruiser Prado 120, while making a replacement?
Original bearing number is absent since it’s supplied in the kit with hub. The original right hub number is 42450-60050, the left hub is 42460-60010
Analogs:
- Koyo 2DACF044N-4 (right), 2DACF044N-4A (left)
- LYNXauto WB-1030 (right), WB-1029 (left)
Testing periodicity implies to be performed at each planned vehicle maintenance. Replacement may also be performed, if required.
First remove the wheel and then screw down the parking brake pads while using a screwdriver.
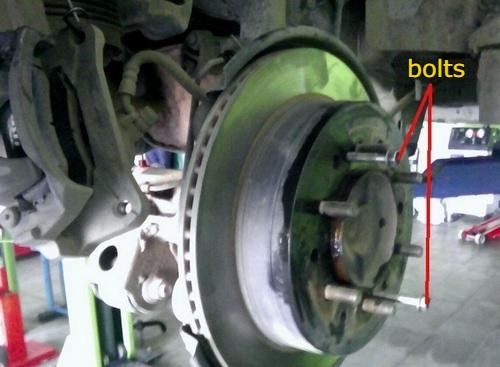
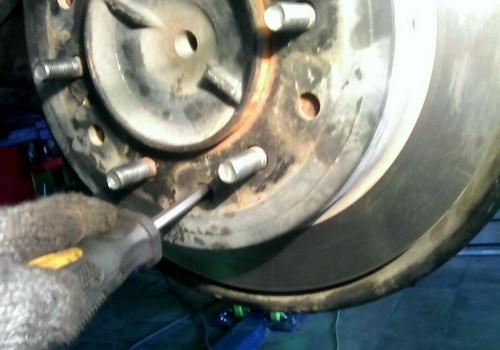
Turn off both brake caliper as well as ABS sensor. Screw 2 M8 bolts into the threaded disc holes with 1.25 thread pitch (evenly and alternately tighten them until the brake disc is removed).
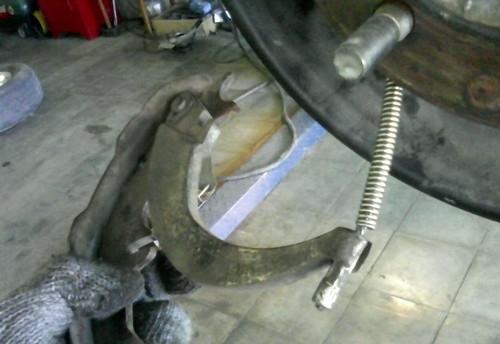
Then remove and disassemble the brake pads and now remove the parking brake cable.
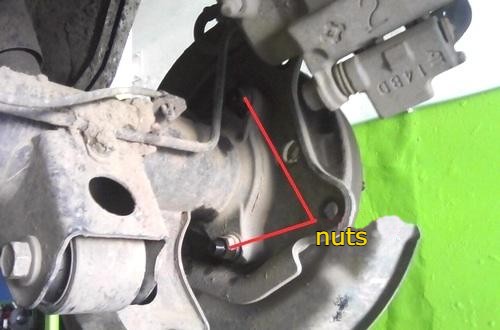
Pull out the rear axle shaft once the axle shaft nuts are unscrewed.
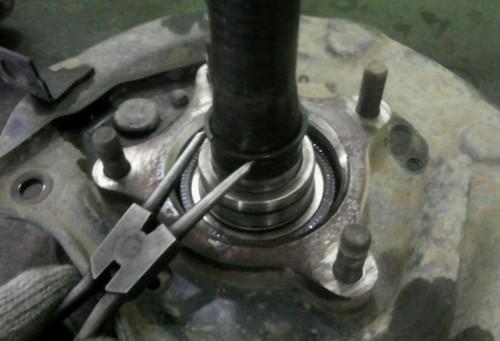
Remove the retaining ring and one pin.

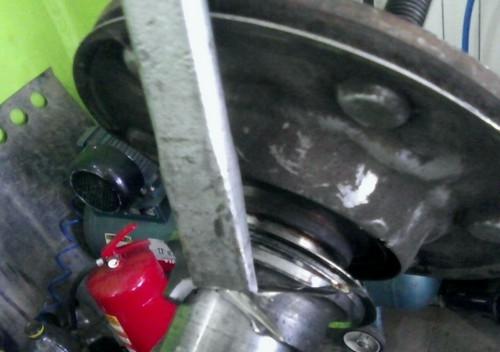
Now cut the locking sleeve along the semi axis while using a grinder (not completely in order to avoid cutting the washer and remove the sleeve part).
Now remove the locking sleeve.
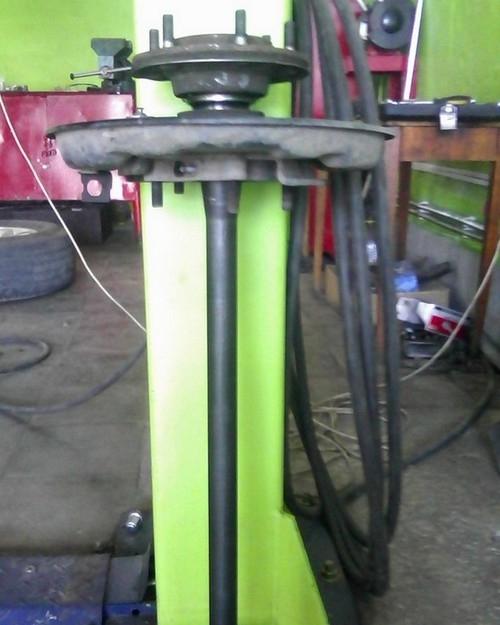
Extrude, if you have a high press. Take semi-axis vertically slotted down and then knock down with a sharp blow from top to bottom if you don’t have a high press (be sure to spread it under the slotted dense wood, a piece of conveyer or aluminum).
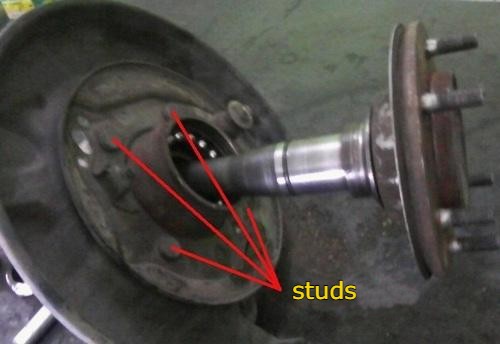
Remove the studs.
Cut and remove the rest of the bearing.
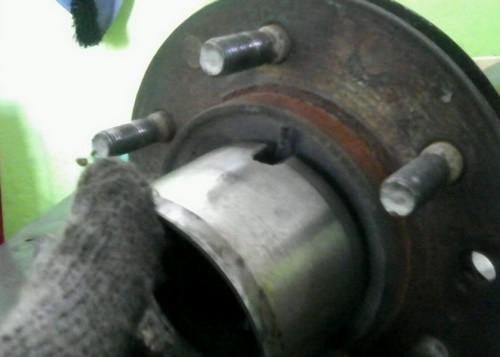
Be sure to use any old bearing, just making two saws in it.
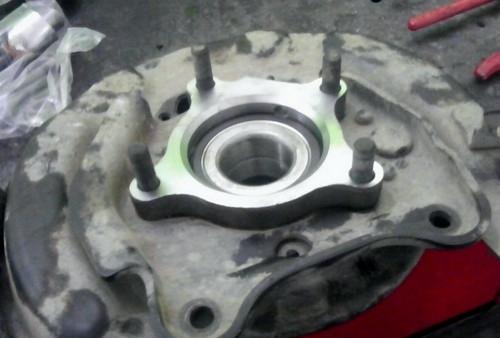
Now set new bearing in the casing and then install studs.

Then shrink while using appropriate diameter pipe.
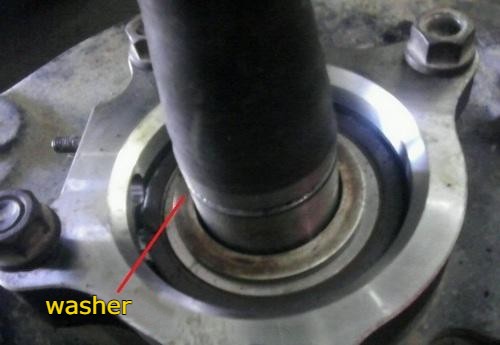
Now put a spring washer.
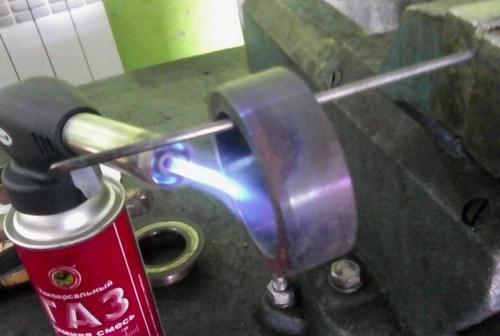
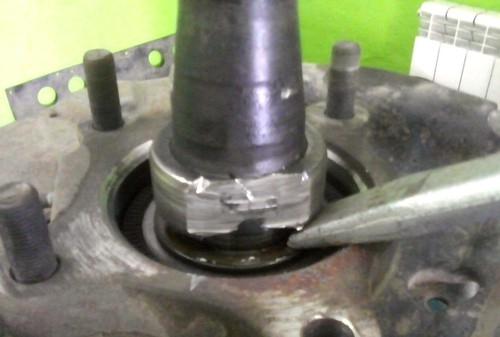
Then heat the locking sleeve up to achieving the color shown in the picture and quickly set the bevel up (it is important to avoid damaging the outer sleeve surface since the gland works on it). Now plant it up to the extent to achieve the groove to open under the retaining ring.

Now install the stopper.
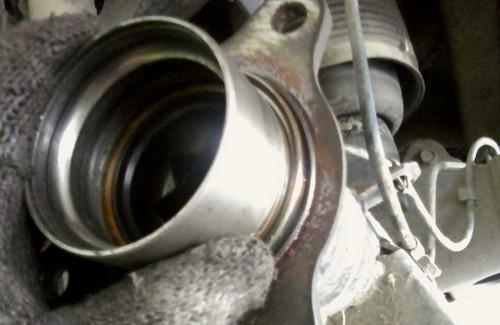
Then install the gland.
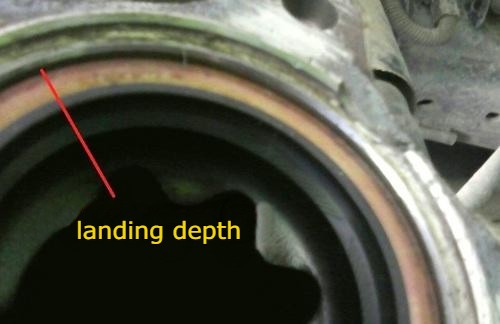
Landing depth should be the same as in the picture. Then, assemble everything in reverse order.
